Showing posts with label Alice Posts. Show all posts

Wednesday, 7 May 2014

Escaping

Yesterday I worked on the GUI text that would appear when the player escapes from the facility.


Above is the screenshot of the scene not being played. I created the GUI 'You have Escaped' text and the 'Press L to Escape', just like the 'You Have Died' text.

 
This screenshot above is when the player has activated the trigger to show the message they have escaped once they have completed the door puzzle and gone through the door.
 
 
Above is a screenshot of the 'End Game' code that was created to show the text when the player enters the trigger within the door. This script is just like the GUIEnd script, which works when the player has been killed by the alien. (This will be shown below).


This script shows when the player has been killed by the alien, and it gives them the option to restart by pressing the 'L' key on the keyboad, just like when you escape from the facility.


Friday, 2 May 2014

Door Puzzle - Update

Yesterday Michael and I worked on expanding the puzzle to open the door.

Below is a screenshot of what the 'handles' will look like before the puzzle is completed. They will be this glowing red. Once they have been rotated to the right angle they turn green.

 
Below is a screenshot of all the handles in the right rotation for the puzzle to be complete. As you can see they are all green now.

 
Below is the On Mouse Rotate script for the puzzle. This is where the material changes colour from red to green when the objects are in their right position - I have higlighted what we added yesterday in purple. We have also scripted the objects to play a sound when they are in the right position so that the player not only has a visual representation of the object being in the right place, but an audio representation as well.


Below is the Puzzle Complete script. Michael pointed out that if the player were to complete the puzzle and have all the pieces green the door would open, however if they then rotate an object after the puzzle has been completed the door would stay open and not close again. So I added the line of code in purple to make sure that the door would close again if all the pieces were not right.

 
Both Michael and I are extremely happy with the result. 

Thursday, 1 May 2014

Door Puzzle

Today I have been working on the door puzzle. We decided to go with the original puzzle of idea of having handles that need to be rotated to a certain point for the door to unlock. So from the original 'Puzzle Complete' script I have added the lines of code which I have highlighted in the purple boxes so that when the puzzle is complete, the door will open. 
 
 
Below is a screenshot of the new script I have made which controls the door animation and makes sure that it will open once the puzzle is correct.

 
I have tested this in the scene I have with the 'L' shaped objects and it works. 

Tuesday, 22 April 2014

Work I've done over the Easter break.

Due to some unforseen circumstances (which will be ongoing till the end of this project) I have not been able to complete as much work during the holidays as I would like to have done.

Over the holidays I had planned on testing out the Pressure Plate script I had been working on leading up to the holidays. I also wanted to complete the Player Health script so that our player would die once the enemy had "hit" our player.

For the player death I was looking at the Unity Script Reference website:

https://docs.unity3d.com/Documentation/ScriptReference/Object.Destroy.html

I was looking to 'Destroy' the Player Game Object once the alien had entered the collider with the trigger.

Object.Destroy

e.g. static void Destroy(Object obj, float t = 0.0f);

"The object 'obj' will be destroyed now or if a time is specified 't' seconds from now. If 'obj' is a Component it will remove the component from the GameObject and destroy it. If 'obj' is a GameObject it will destroy the GameObject, all it's components and all transform children of the GameObject. Actual object destruction is always delayed until after the current Update loop, but will always be done before rendering".

With this, and after watching some JavaScript YouTube tutorials (couldn't find any C# videos for this, which was very frustrating), I tried to incoporate it in to the Player Health script we have. As of yet I am having no luck with it working (to be honest it's probably something really simple and I just cannot for the life of me see it at this moment in time, hopefully someone else in the group might be able to spot it for me).

Tuesday, 8 April 2014

Pressure Plate Puzzle

For the last week or more I have been looking at a tutorial on Digital Tutors. This tutorial is titled "Creating an Action-Adventure Puzzle in Unity". I have been working my way through the 16 videos, I am currently on number 11 and I am completing the quizzes at the end of each video. Within this tutorial there is a puzzle which the player has to complete; to complete the puzzle they have to walk over certain pressure points, in a certain order for a door to open.

I am hoping we will be able to use this puzzle idea within our game. For our game, the player has to navigate the maze and avoid the aliens to be able to escape the facility. Whilst avoiding the aliens around the maze, I thought this puzzle would be perfect for the player in our game to complete, as it will not detract from what we had in mind to begin with. By completing this puzzle, they will then be able to unlock the door and escape.

I have run this past the other members of the group and they seem to be up for having this puzzle element within our game. (Screenshots to follow).
A possibility with this puzzle, (like they have done in the tutorial) is to have the light orb, as the 'key' to be able to complete the puzzle. In the tutorial, they have a torch which needs to be placed in to the wall, which then allows the player to complete the puzzle thus opening the door. This is an added element we could have to tie all of our game elements together.


Here are some screenshots of the code that I have been creating with the help of this tutorial.

 Below is the Torch Script


Below is the Pressure Plate Script


Below is the Puzzle Logic Script


During this tutorial I encountered a few problems (not as many as I was expecting to run in to though!). Michael managed to help me fix one of the problems, where I had just mis named something, and since then all the scripts have been working. 


Wednesday, 26 March 2014

Daily Update

For the past couple of days I have been focusing on looking at the Unity Stealth project once again. This time I have been focusing on the Screen Fader script (as mentioned previously), I have implemented this in a seperate Unity Project to that of our main file to make sure that it works, before handing it over to Michael.


As well as this, I have been trying to implement the Player Health script that they have, however that is proving to be a little difficult, because they use a lot of code that is not necessary for our game. So I have been working on cutting out the un-wanted code and making it more clear and concise for our game.


Tuesday, 18 March 2014

What I have been up to the past week.

For the past week I have continued to watch Unity tutorials on coding. Also, last Monday 10/03/14, Alister our coding teacher popped in, in the afternoon and helped us out with our Enemy AI Code.

With his help Michael and I were able to see how we would be able to get our enemies to see our player, thus making them change from a patrolling state, to a chase state. Then once the player is out of sight, the enemy would return to it's patrolling waypoints.

It took quite a few hours in all (from about 2:00pm - 5:00pm!), and whilst doing it we encountered a few problems, but Alister was able to problem solve them and then explain the problems to us and how he had managed to fix them. It was a really helpful and useful session because Alister was able to spend alot of time with us, and go through all the problems we had, and was extremely helpful in explaining what was actually wrong, what was causing it and then how to fix it. I personally learnt alot during this session, just by watching and taking it all in, at a pace that suited me very well. I have found in the past that I learn better this way, by observing and then having a go myself.

(Will put here the specific bits of code which were added during our session with Alister here).

This past week, I have had trouble getting on to the digital-tutors website, so I haven't been able to watch any tutorials from there this week. I am still having the same problem today, so I hope that is sorted soon as there is a new tutorial which has been uploaded recently on how to make an Adventure Puzzle game, so as soon as digital-tutors is working, I shall crack on and watch those.

Whilst digital-tutors hasn't been working, I have been continuing to explore the Unity website, and go over some of the Unity Stealth videos I watched at the beginning of the year. The particular video that I have been most interested in this week, has been the Screen Fader tutorial. In this tutorial it shows you how to create the screen fader for the game "using a simple GUI Texture and Color Lerp script". This is going to be used when our player dies, the screen will turn to black and say "Game Over". Along with the video explaining how to create the code, on the same page is a box with all of the code there for you (this happens on the other scripting tutorials for the stealth project), which has comments explaining what each specific part of the code is doing. This is extremely useful as you can follow along with this script whilst they are going through it in the video.

This week, I am hoping to look at how to create the player health script, so that when the player comes in to physical contact with the enemy, the player will die. By completing this, it means that I can then incorporate this screen fader script, and that will be the all the player scripts completed.

Here is the screen fader script with the comments explaining what is going on within the script.


Wednesday, 5 March 2014

Books I've Been Looking At

Here are two of the many books I have bought for both Unity and Coding.

The first book is called "Beginning 3D Game Development with Unity 4, All-in-One, Multi-Platform Game Development" - by Sue Blackman. I have found this book to be well structured, it's basically broken down in to two parts: the first part explains the overall logic involved when making games, which quickly gets you to the point where you can create simple game assets that can be built upon. The second part of the book walks you through the basics of a 'point and click' style first person game. In this part of the book I have found it extremely helpful looking at the state management scripts. What I have also found good with the parts that I have read in this book, is the easy to follow language used, which isn't too much to handle all at once, and it encourages the use of problem-solving skills, without it becoming too stressful or over-bearing, which is a vital part of scripting/ coding.


The second book (the latest book that I have bought), "Unity 4.x Game AI Programming" - by Aung Sithu Kyaw, Clifford Peters and Thet Naing Swe. This book specifically goes through "how to implement various AI Techniques in Unity3D by implementing the algorithm from scratch".

I have just started reading this book, and so far I have found it to be extremely useful and easy to follow. There are no big paragraphs of text, each bit of important information is written in a short and concise manner which makes it that much easier to follow. It also has extracts of code in the book which are simple to follow as well. 

Fingers crossed, with the help of the these two books (and the other 3 I have purchased on the topic of Unity and Coding), I hope to be able to learn a lot in the next coming weeks and months for our project, and they should be very helpful even past the deadline date for our project.

05/03/14 - Stealth Project Tutorial

Today I have been watching the Unity Stealth Project tutorials about the enemy AI again, still trying to figure out how to incoportate how they have coded the Enemy Sight part of the tutorial and how I can then implement this in the existing code I have from a Tutorial Alister gave the class earlier in the year (I will copy and paste the code below rather than print screen it, because it is too long to print screen, and I shall apologize now for how long this post will be because of this!!). So far we have teddy bears (acting as the alien enemy) moving around to waypoints, and then when they come to in to contact with one another, the 'throw' animation plays. What we want to have is, the enemy chases the player when they come in to the enemys field of vision, once/ if/ when they have caught up to the player, the 'throw' animation will play, and the player will die. I am going to start working on a player health script this week as well.

using UnityEngine;
using System.Collections;

public class AI_Patrol : MonoBehaviour
{


 #region public_vars 

 public enum AIState { none, idle, walking, run }

 public float patrolSpeed = 2F;       // The nav mesh agent's speed when patrolling.
 public float patrolWaitTime = 1F;      // The amount of time to wait when the patrol way point is reached.

 public float patrolSpeedDamper = 5F;     // Patrol at 1/5th of animation speed

 public AIState currentAIState = AIState.none;

 public float speed = 0.5f;

 private const float MIN_NAVAGENT_SPEED = 0.1F;
 private const float MAX_NAVAGENT_SPEED = 1.25F;
 private const float m_SpeedDampTime = .25f;
 private const float m_DirectionDampTime = .25f;

 private int   m_WayPointIndex = 0; 


 private int maxWaypointIndex = 0;

 private NavMeshAgent nmaAI = null;
 private Animator animatorAI = null;

 private const float MIN_IDLE_TIME = 2;
 private const float MAX_IDLE_TIME = 8;


 private int currentWaypointIndex = 0;

// #endregion
// #region public_methods

// #endregion

 //#region private_methods

void Awake()
 {
  nmaAI = GetComponent<NavMeshAgent>();
 }

 // Use this for initialization
 void Start ()
 {
  animatorAI = GetComponent<Animator>();

  StartCoroutine( Idle() );

 }

 void OnTriggerEnter( Collider hit)
 {
  Debug.Log("AI_Patrol: OnTriggerStay hit: "+hit.gameObject.tag);

  if( hit.gameObject.tag == "Enemy" )
  {
   Throw ( hit.gameObject );
  }
 }

 IEnumerator Idle()
 {
  currentAIState = AIState.idle;

  float randomIdleTime = Random.Range( MIN_IDLE_TIME, MAX_IDLE_TIME ) + Time.time;

  while( randomIdleTime > Time.time )
  {
   animatorAI.SetFloat("Speed",0 );
   nmaAI.speed = 0 ;

   yield return null;
  }

  StartCoroutine( Patrolling() );
 }


 IEnumerator Patrolling ()
 {
  currentAIState = AIState.walking;

  // Set an appropriate speed for the NavMeshAgent.
  nmaAI.speed = Mathf.Clamp( animatorAI.GetFloat( "Speed" ) / patrolSpeedDamper, MIN_NAVAGENT_SPEED, MAX_NAVAGENT_SPEED );

  // Set the destination to a random patrolWayPoint.
  //nmaAI.destination = Waypoints.GetRandomWaypoint();

  nmaAI.destination = Waypoints.GetWaypoint(currentWaypointIndex);
  currentWaypointIndex++;

  bool endPatrol = false;

  // While not near the next waypoint or while there is a destination...
  while( !endPatrol )
  {
   if( Vector3.Distance( nmaAI.destination, animatorAI.rootPosition ) > nmaAI.stoppingDistance )
   {
    animatorAI.SetFloat( "Speed", MAX_NAVAGENT_SPEED,m_SpeedDampTime, Time.deltaTime );

    Vector3 curentDir = animatorAI.rootRotation * Vector3.forward;
    Vector3 wantedDir = ( nmaAI.destination - animatorAI.rootPosition ).normalized;

    if( Vector3.Dot( curentDir, wantedDir ) > 0 )
    {
     animatorAI.SetFloat( "Direction", Vector3.Cross(curentDir, wantedDir ).y, m_DirectionDampTime, Time.deltaTime );
    }
    else
    {
              animatorAI.SetFloat( "Direction", Vector3.Cross(curentDir, wantedDir ).y > 0 ? 1 : -1, m_DirectionDampTime, Time.deltaTime);
    }

    nmaAI.speed = Mathf.Clamp( animatorAI.GetFloat( "Speed" ) / patrolSpeedDamper, MIN_NAVAGENT_SPEED, MAX_NAVAGENT_SPEED );
   }
   else
   {
     endPatrol = true;
   }


   yield return null;
  }

  StartCoroutine( Idle() );
 } 

private bool throwing = false;

 public void Throw( GameObject hitObject )
 {
  if( !throwing )
  {
   StartCoroutine( AnimateThrow( hitObject ) );
  }
 }

 public float rotationDelta;

 IEnumerator AnimateThrow( GameObject hitObject )
 {
  if( !throwing )
  {
   throwing = true;

   animatorAI.SetBool( "Throw", true);
   yield return new WaitForEndOfFrame();

   AnimatorStateInfo stateInfo = animatorAI.GetCurrentAnimatorStateInfo( 0 );

   animatorAI.SetBool( "Throw", false);

      // transform.LookAt( hitObject.transform.position );
   bool rotating = true;

   float endOfThrowTime = stateInfo.length + Time.time;
   float step = speed * Time.deltaTime;

   while( rotating)
   {

    Vector3 targetDir = hitObject.transform.position - transform.position;

    Vector3 newDir = Vector3.RotateTowards(transform.forward, targetDir, step, 0.0F);

    Debug.DrawRay(transform.position, newDir, Color.red);

    transform.rotation = Quaternion.LookRotation(newDir);


//    if(Mathf.Abs( (int) rotationDelta ) > 179 )
    if( endOfThrowTime < Time.time )
    {
     rotating = false;
    }

    yield return null;

   }

   transform.LookAt( hitObject.transform.position );

//   yield return new WaitForSeconds( stateInfo.length );

   throwing = false;
  }
 }
 #endregion
}

Saturday, 1 March 2014

Scripting

This week I have been focusing my attentions on some tutorials on the Digital-Tutors website. Throughout the week I have been working my way through 15 of the 18 tutorials/ videos on scripting in Unity, in addition to looking at the Stealth Project on the Unity website, to figure out how we will get our enemies to spot the player and chase after them.

Here is a screenshot of the scene that I have currently been working on, Lesson_15. So far I have coded the cube to move in all directions as well as being able to 'jump' in to the air, without flipping over.


As you can see I have been saving each lessons scripts as well as saving important scenes so that I can refer back to them with ease at a later date.

Below is a screenshot of the code that I have been learning in the tutorials. This particular code has materialised over many lessons, starting at Lesson 11 where I learnt how to code the basic movement of an object, to Lesson 15 where I am at now, where the cube in the scene can move about in all directions and jump in to the air without flipping/rotating over. 


I have found these tutorials extremely useful as they are broken down very nicely, which makes them very easy to follow along. Furthermore after you have finished a particular lesson, (each lesson is a video), you are then quizzed about a fact that was mentioned in the video. I have found this particularly good for me, as I find I learn better with quizzes and things like that in general, so I feel I have picked up more knowledge about what was mentioned in the video, than if I had gone straight on to the next video without the quizzes in-between. 

Over this weekend I am going to finish the next 3 videos that I have left to do on the Digital-Tutors website, then I shall continue on to the Enemy Sight script. However at this moment in time, I am finding it very difficult to transfer over what is being mentioned in the Stealth Project tutorials, over to the script that I currently have, which already has the enemies walking to specific waypoints. However if I get to a point where I cannot continue with it unless I have some help, I will focus my attentions on to the flickering light script (which needs to be tested) and the triggered events/ sounds scripts in the mean time, until I am able to get some help on how to implement the specific bits of code that are needed for the enemy to spot the player in our existing script. 

Here is a series of screen shots of the codes that I have been working on from Lesson_11 - Lesson_14.


Here you can see how they have progressed from a basic movement script, to a fully functional movement and jump script. 


Wednesday, 26 February 2014

PlayMaker

Ewan told me today about how you can use PlayMaker to code the story sequences of a game. This might be really useful for our opening and closing scenes.
So I might in the next coming days spend time looking at the tutorials and see if it would be a good idea to use PlayMaker for this part of our game.

 
(this image was taken from the playMaker main website home page).

Wednesday, 19 February 2014

Catch Up on Work - Completed and What Needs to be Done.

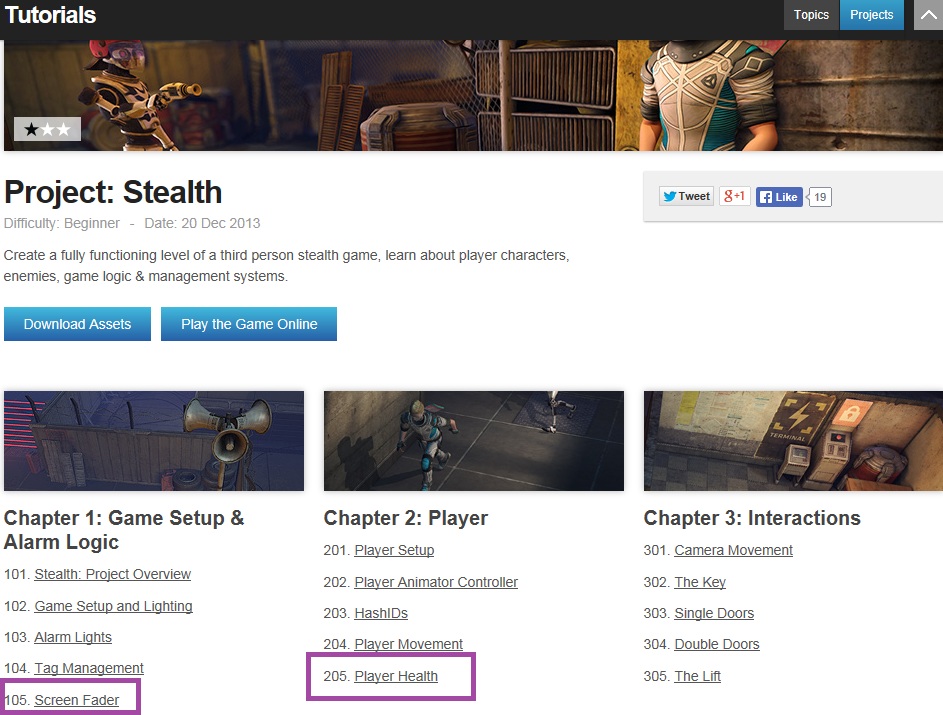
For the past couple of weeks I have been looking at the Stealth Project, which is a Unity tutorial on their website.

https://unity3d.com/learn/tutorials/projects/stealth

With the help of this tutorial I have been working through the chapters that will apply to our game, such as the Interactions Chapter (Here I have been looking at the Single and Double Doors tutorials, as well as The Key tutorial), The Enemy AI Chapter (Chapter 4), where I have been looking at the Enemy Setup, Enemy Animator Controller and the Enemy Sight tutorials, to name a few. As well as a couple of videos from the Player Chapter. I will continue to watch the tutorials within these different chapters in the upcoming weeks.

I have found these tutorials extremely useful and very easy to follow along. They are well made, enabling me to learn the specific skills I need for our project in quite a timely manner. Furthermore, with our new access to the digital-tutors website I hope to be able to pick up a few more skills that can contribute to our project from there in the next coming days and weeks.

Additionally, I have been referring to our Trello page and I am checking off each script that has been assigned to me to complete once I have made it. This has been extremely helpful in keeping me up to date with what needs to be done, as well as being a helpful confidence boost when I see what has already been ticked off/ completed.

The Scripts that I have completed are:

Puzzles
AI Patrols
Level Transition
Progression Scripts (when a player does something it triggers an action)
Lever Transition

The current scripts I am working on at the moment are:

Enemy Sight - from the Stealth Project Unity Tutorials
Flickering Light Code
Doors - Stealth Project

I hope to have all of these, if not 2 of the 3 done by the end of this week (as I have already started them all).

For next week I hope to start working on the Player Light (the orb), such as working on the expriry of the light being emitted, recharge, and it being able to distract the AI. As well as the triggered events/ sounds.

All of the scripts that I have been tasked to create are (that have not been completed as of yet):

Prison Level

Light Flickers
Locked door sound played upon entering a collision
Door open when puzzle is completed
Triggered Events (Specifity will be applied in discussion)
Player Light (Expiry, Recharge, Distract AI)
Detention Scripts - when and how the AI detects the player
Triggered Sounds

Tutorial Level

Doors

Wednesday, 15 January 2014

Rotating Puzzle

A puzzle idea that Joe came to me with was the idea of having objects blocking the path of the player so that they cannot continue until they are moved. The problem is however that they rotate, so the player needs to rotate them until they are at the right angle so that they can then progress forward on to the next stage. I had help with this from our coding lecturer who was in today to show me how to do it. The script written rotates the object, there is not an animation on the object, which was an idea/ possibility in the beginning.


Here is the beginning scene.

When the player walks up to the object, all they have to do is click the object and it rotates to another position.

Each time the player clicks it will change its rotation, the player can do this until it is at the right rotation for them to continue on through the level.

Here is another screenshot of another rotation.

Here is a screenshot of the object behind rotating as well. This script can now be applied to any object that we would like to be able to be rotated.


This code above is the OnMouseRotate script. When the player clicks the left mouse button down, the object will rotate to a 90degree angle. In the Unity Inspector we can choose which angle we would like to be the right angle for the puzzle. Once the player has rotated the object to the right angle, the code then has a target reached function. 


This screenshot above is the puzzle complete code. This works in conjunction with the OnMouseRotate script. So that when all of the objects have reached their target rotation, the puzzle will then be completed. We are hoping to have this puzzle work so that once it is complete it will then open the door for the player to escape.

Stair Puzzle

For one part of our game, the protagonist character will drop to the floor below once she passes a certain point within the level, as the ground below her gives way. Her only way to escape from this room is to build a set of stairs out of the objects around her (boxes, barrels and crates etc.) back up to where she came from so that she can continue to escape.

Here is the basic layout of the blocks (these will be the boxes and barrels etc.) they then fall to the floor (as shown in the photo below).

Boxes have fallen to the floor, so that the player can now go over to them and interact with them.

Here is a photo of the player holding the block, the player is about to move it high and low as well as move it from left to right.

They are then able to stack the blocks, thus enabling them to form stairs.

Here is a photo of a trigger area which will load the next level of the game. This might not be necessary however I have played around with it and as shown in the photo below it changes to the new level, so this is a useful code to have just incase we need it.


This first bit of code above is the actual pick up and drop code. In this code I am using a Raycast to see if we are holding an object. Once the player has clicked the mouse button down, the object then gets parented to the camera, becomes a kinematic object. The player is only able to pick up objects which have the 'Interactive' tag assigned to them in the Unity Inspector. 


The code above is for the level to load once the player is in the trigger area. This code was very simple, using the OnTriggerEnter method, once the player is in the collider with the trigger, the Application.LoadLevel(levelName); is called and the new level loads for the game. 

Sunday, 12 January 2014

Puzzle Level

Here is a quick overview of our puzzle level. We have been working on the main mechanics of how we want our puzzles to work, and also what type of puzzles we want the player to complete. The first two puzzles that we have in place (that will be shown in the photos below) show that by pressing levers (at the moment they are two grey boxes) some items in the world will change in to a position so that the player can advance, for example one lever moves a box underneath a grate so that the player can escape, where as another lever allows a box which is in the air to come down, so that the player can use it as a 'stepping stone' to get to the other side.

This first photo is just showing the layout as we have it so far. in the bottom right hand there is an additional room that has yet to have been placed properly, however when this is done this room will be 'downstairs' and the player will fall in there once they have completed the puzzles in the first room, the only way for them to get out of this downstairs room is to build a set of stairs up to the opening so they can continue.

This photo shows the 'stepping stone' block up in the air before the player has activated the trigger. 

Here is a screenshot of when the lever has been activated, and the box has moved in to its correct position so that the player can now advance over to the other side.

Here is the beginning stage of the grate and box puzzle. The grate is too high to jump in from the ground, so the box is needed to be able to give that extra height. Just like the puzzle shown above, a lever is needed to be activated: 
(The large grey box to the right of the screen is the lever) this has been activated, so now the box has moved under the grate so that the player is now ready to advance to the next section.